What are hooded eyelids? It's when the top bit of skin above your eyes folds over a bit, hiding a majority of your eyelid. There are lots of people who have this, including (as a reference) Blake Lively and Selena Gomez.
The problem these eyelids bring about is that you work hard to apply an eyeshadow, and then it all but disappears when you step back! So I'm going to show you a little step by step guide on how to make a smokey eye look with these kinds of eyelids!
Everything I used minus the Faux Cils YSL mascara I did a review about last week! Oh and I never did get around to using the brush on the far left, oh well.
1. Put on foundation or tinted moisturizer, depending on what your skin needs.
PLEASE IGNORE MY AWFUL FINGERNAILS OMG. Ok they are truly terrible, I am aware of this guys, and I was growing them out (I've been a nail biter forever) but I started a medicine that makes me really anxious and so I've been biting them and the cuticles are out of control just. Ignore.
Blend foundation/ tinted moisturizer into skin well. I used my fingers here, but it's recommended to use a foundation brush (liquid or powder).
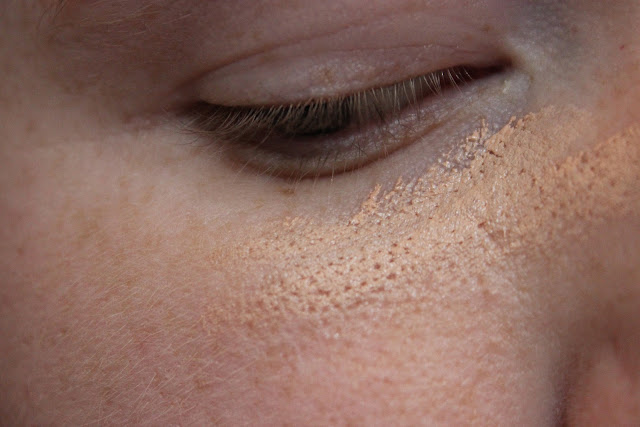
2. Conceal dark circles under eye. Here I'm using Laura Mercier's secret concealer duo
Blend really well so that those circles under your eye disappear! I like this product OK but I think I'm going to start shopping around for better ones.
3. Apply the ever crucial eyeshadow primer. I'm using the Laura Mercier one from January favs!
You can use your ring finger or a cream eyeshadow brush to blend in well throughout the entire lid, and up and around, wherever you plan on putting eyeshadow. Since this is a smokey eye, we are going to be going up (not all the way to the eyebrow) and under the eye slightly, forming a slight oval that is varying in degrees of darkness.
It's ok if some gets on your eyelashes. You'll cover those up anyway.
4. Fill in your eyebrows if need be. Mine are so freakishly light that I probably should more often. Use a shade much lighter than you think you'll need. I used Omega by MAC.
Use an angled brush if you have one (mine is dirty and I'm lazy) or a flat brush and follow your natural arch. If you don't have one, create a natural, thick eyebrow. I really dislike thin eyebrows, it reminds me of bad times in my past and is incredibly distracting and not in a good way.
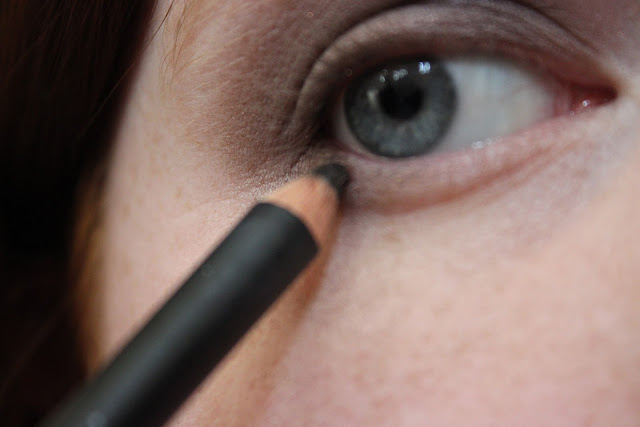
5. Line in between the lashes on the upper eyelid.
I used Nars' eyeliner in Black Moon.
It will be awkward at first. The idea is to get an eye pencil that is sharpened, but dulled a bit so it doesn't physically hurt. From one end of the eyelid to the other, wiggle some color between your eyelashes. This makes them look more full and darker in a natural way.
6. Chose the eyeshadow color you want to be the lighter color or the base. I used a color from an old Laura Mercier artist's palette called Chocolate.
If dust falls as you can see in the photo, don't worry, you can use a big brush to wipe that away later. I start out by patting this on so I get a good color base, and then move upwards.Extend the color about as far as my pinky indicates. You'll slowly want to buff your way there. An eyeshadow blending brush is CRUCIAL for this look, so you should invest in one. It makes your work so much easier and brings the look together.
Noticed how I brought some color out to the sides. You can blend that slightly under the eye for some continuance.
7. I take a darker color to make the look more dramatic. You can make a smokey eye of any color you want to, and I normally do lighter browns or greys in the daytime, and darker shades at night such as golds, blacks, bronzes, etc.
I chose to use Chanel's #75 Ombre Essentielle in Magic Night
Continue out and get as dramatic as you want to. Don't be afraid to experiment with colors, but just remember that because your eyelid is obscured by that skin, you need to go out farther than you may be used to. Take your time, and continue looking straight ahead with relaxed eyes to see what the make-up will look like when you are out and about.
8. Line the bottom third of your waterline
out of focus and driving me crazy
9. Continue on and line the top part of your eyelid. I blend it a bit with my pinky or a smudge brush to make it blend in with the colors around it. This makes the look more dramatic.
10. (Optional) I like to take some color and bring it to the bottom lash line. I think it softens the look and makes it more appealing. The color I chose to use was Laura Mercier's Tiger's Eye
This brush is far too large but it'll to the job.
11. Curl your eyelashes. I have the Chanel eyelash curler and I adore it. My eyelashes tend to go straight in random parts and super curly in others, so this evens them out and makes them uniform.
12. Apply mascara! As I mentioned earlier, I used YSL Faux Cils. I applied it twice and it was very dramatic.
This is a picture of my eyelashes after just one coating.
13. Apply blush gently along the cheek bone. I used Smashbox's Blush Rush in Masterpiece.
You don't need much because your eyes are so dramatic, but you do need some to give angles to your face if they are lacking.
14. Chose lipstick! I chose that favorite of mine, the Chanel #40, Charme. It's a soft pink that is gorgeous but not too dark. I could have gone darker in lip color if I wanted to, or lightly applied a red, or done a lighter pink. It's up to you, have fun with it!
This is a great smokey eye look for daytime. It's not overbearing and is just dramatic enough. As you can see, you can use darker colors that are sexier throughout the eye to create the perfect nighttime look. I think a beautiful bronze mixed with black liners and a soft nude lip with light pink lipgloss would be so divine.


No comments
Post a Comment